We extend our heartfelt gratitude to all our valued customers who have purchased this exceptional script, as well as those who are considering making a purchase. We are committed to providing continuous updates, which you will receive free of charge. Moreover, we highly value your questions and concerns, and we are always ready to assist you. Thank you for choosing us.
Courier DEPRIXA PRO is a software specifically designed for companies engaged in online package and purchase management. It offers a comprehensive logistics monitoring system for storage and cargo handling, ensuring efficient delivery to the final destination. The software incorporates modules that facilitate automated billing based on the cargo's dimensions, weight, and shape.
One notable advantage of Courier DEPRIXA PRO is its web-based nature, enabling users to access it from a PC, tablet, or smartphone with an internet connection. This flexibility ensures seamless accessibility and convenience for our users.
PDO (PHP Data Objects) is an essential component of PHP, providing a consistent and efficient way to manage database connections and handle data across various database engines.
Deprixa Pro is developed using native PHP and PDO, leveraging the power and elegance of this programming language. However, itâs crucial to ensure that specific extensions are enabled on both local and web servers for the script to function correctly. Below is a list of required extensions:
Log in to your Codecanyon account and download the Deprixa Pro file.

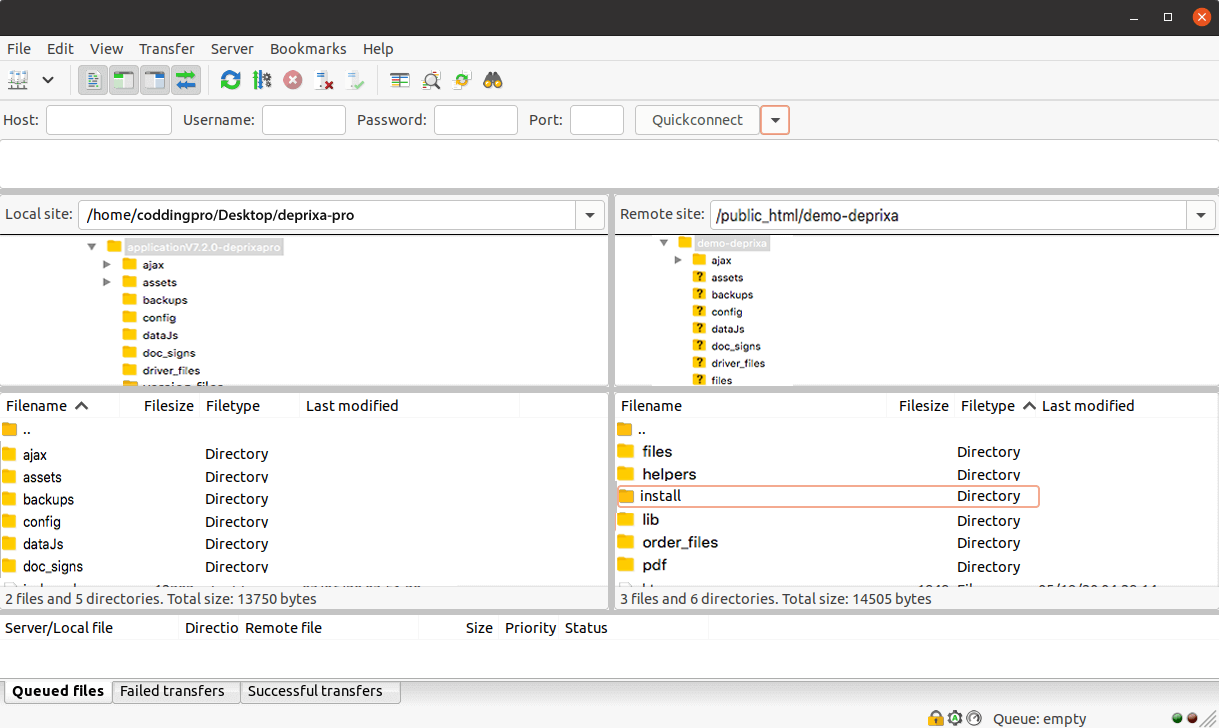
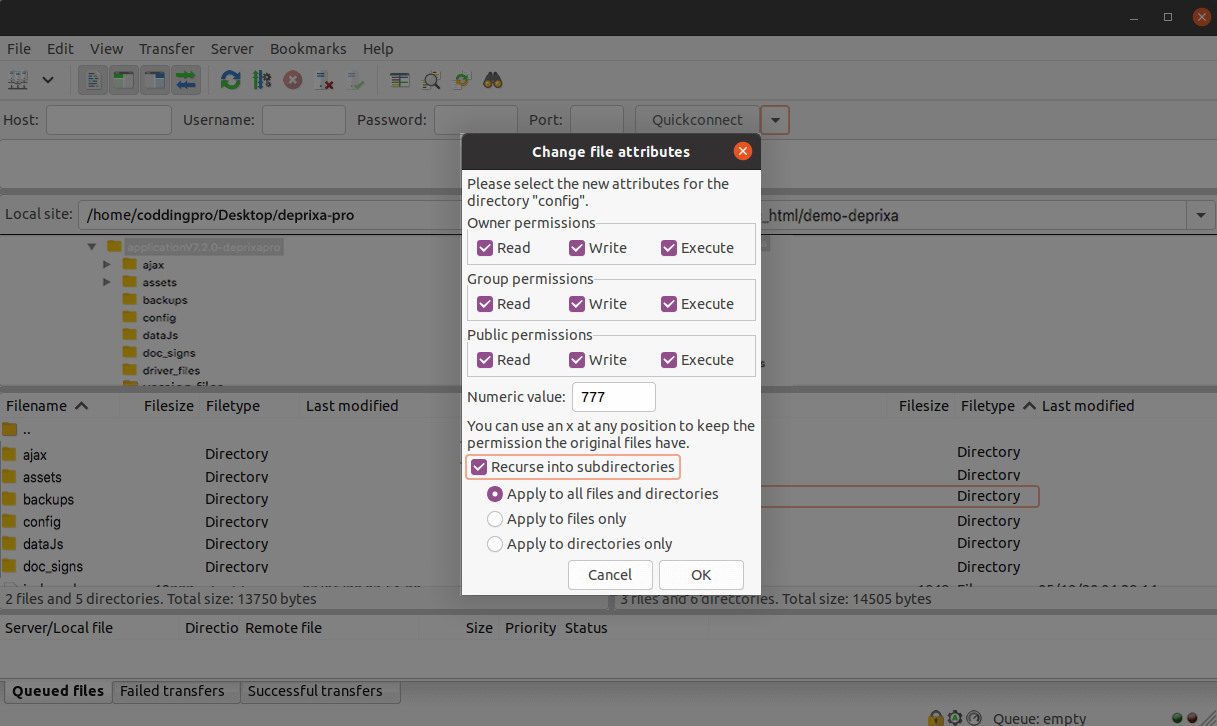
Using an FTP client or directly on your server, upload all the files from the application folder.
Create a MySQL Database via your web hosting provider's control panel (e.g., cPanel). Once created, remember the following information:


PHPMailer offers many advantages over PHPâs core mail() function, including SMTP SSL encryption, authentication, HTML messages, file attachments, and more.
Additionally, PHPMailer is easier to use than mail() and provides a clean, readable object-oriented syntax.
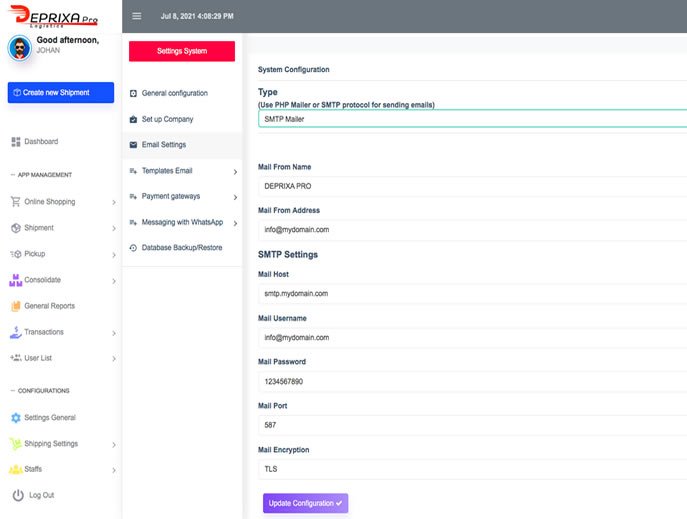
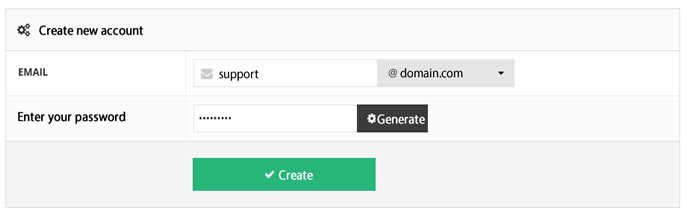
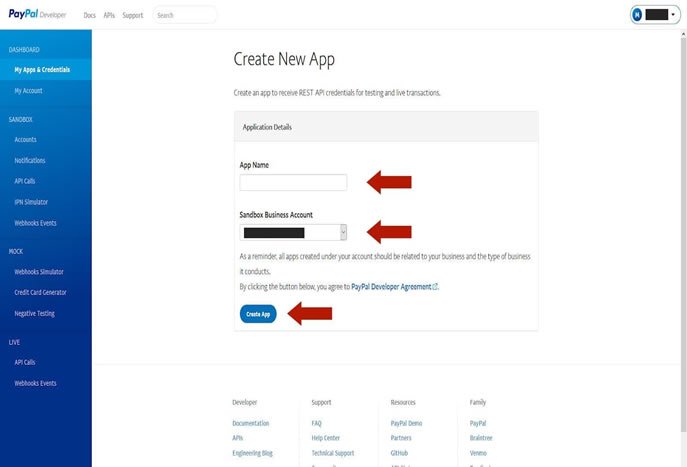
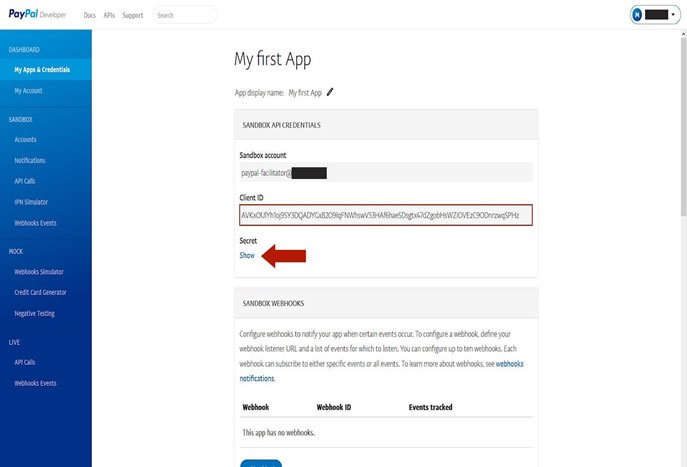
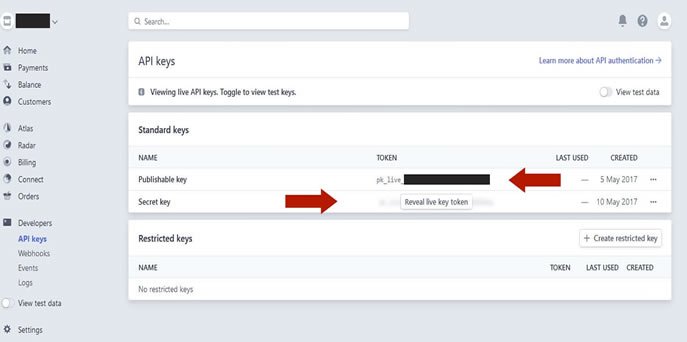
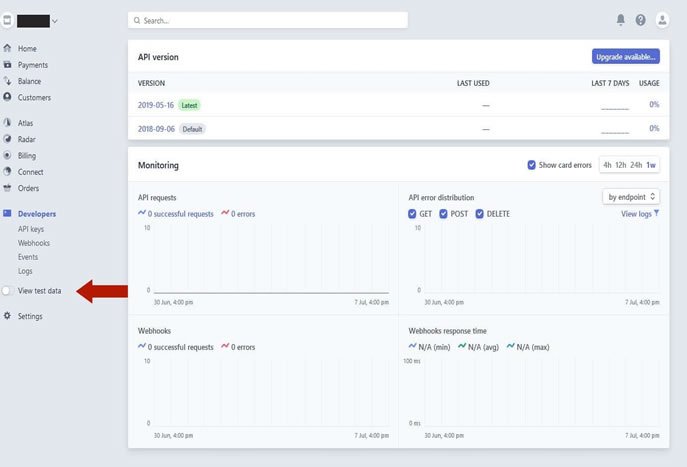
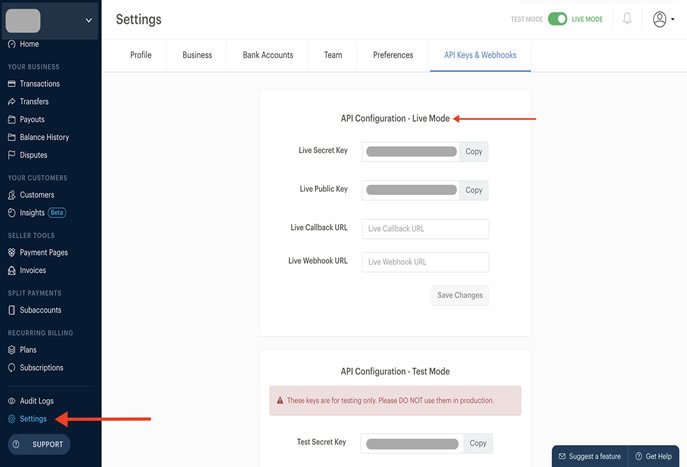
Once DEPRIXA PRO is installed on your web server, you can configure SMTP as follows:
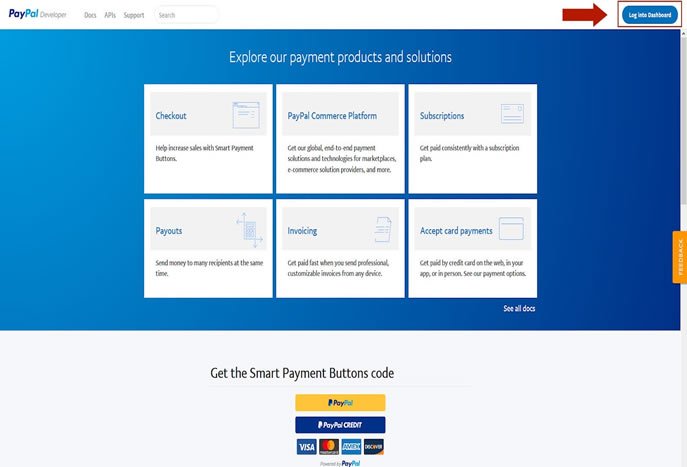


Ultramsg API enables you to integrate your applications with our WhatsApp messaging system. You will find everything you need in your favorite languages, including sample apps for web, iOS, and Android.
The main advantage of our system is its simplicity of implementation. Every message sent from our system has a unique ID, allowing you to receive delivery confirmations.
Deprixa Pro is built on native PHP with PDO, following an MVC-inspired structure without an external framework. This makes it lightweight, easy to customize, and compatible with any shared hosting that meets the PHP 8.4 requirements.
Every request enters through index.php, which loads the session, authenticates the role via the RBAC layer, and dispatches to the appropriate module controller. Each module handles its own database queries through PDO prepared statements. Responses are rendered through PHP view templates included via the module controller.
Language files are stored in lang/. The system supports Spanish (ES), English (EN), Arabic (AR â RTL), French (FR), and Hebrew (HE). The active language is stored in the session and applied globally on every page load.
The main folders and their purposes:
assets/ â CSS, JS, images, uploads, logos, and customer profile photosconfig/ â Database connection, global constants, and environment settingshelpers/ â Utility functions, license validation, and session managementinstall/ â Web-based installer (must be deleted after installation)lang/ â Translation files for all supported languagesmodules/ â All system modules (courier, pre-alerts, warehouse, pick-up, reports, settings, etc.)doc_signs/ â Digital delivery signature files (do not delete)order_files/ â Files attached to shipmentspre_alert_files/ â Files attached to pre-alert registrationsdriver_files/ â Driver profile documents and photosImportant When updating between versions, always restore the upload folders (doc_signs/, order_files/, pre_alert_files/, driver_files/, assets/uploads/) from your backup to avoid losing customer data.
The core module of Deprixa Pro. Handles the complete lifecycle of a shipment from creation to delivery and payment.
Pre-Alerts allow clients to register online purchases they have made from international stores (Amazon, eBay, etc.) before the package arrives at the warehouse. This is the key differentiator between Deprixa Pro and Deprixa Basic.
The Warehouse module manages packages that arrive at the logistics warehouse before being assigned to a final shipment. The Pick-Up module allows clients to schedule a collection from their address.
Version 8.5 introduces a full Role-Based Access Control (RBAC) system, giving administrators granular control over what each user can see and do within the platform.
Permissions are configurable per role from Settings â Roles & Permissions. Module-level access (view, create, edit, delete) can be toggled independently for each role.
Deprixa Pro 8.5 introduces a powerful tariff engine that calculates shipping rates automatically based on configured rules, eliminating the need for manual pricing on every shipment.
Configure tariffs from Settings â Tariffs. Client special tariffs are set from Clients â [Client] â Special Tariff.
The Excel Import module allows administrators to create multiple shipments at once by uploading an Excel (.xlsx) file, dramatically reducing manual data entry for high-volume operations.
Access from: Courier â Import Shipments.
Deprixa Pro includes a built-in database backup module accessible from Settings â Backup. It is highly recommended to schedule regular backups before applying any updates.
doc_signs/, order_files/, pre_alert_files/, driver_files/, assets/uploads/, assets/payment_packages/.mysql -u user -p dbname < backup.sqlAfter installation, apply the following security measures to protect your Deprixa Pro installation:
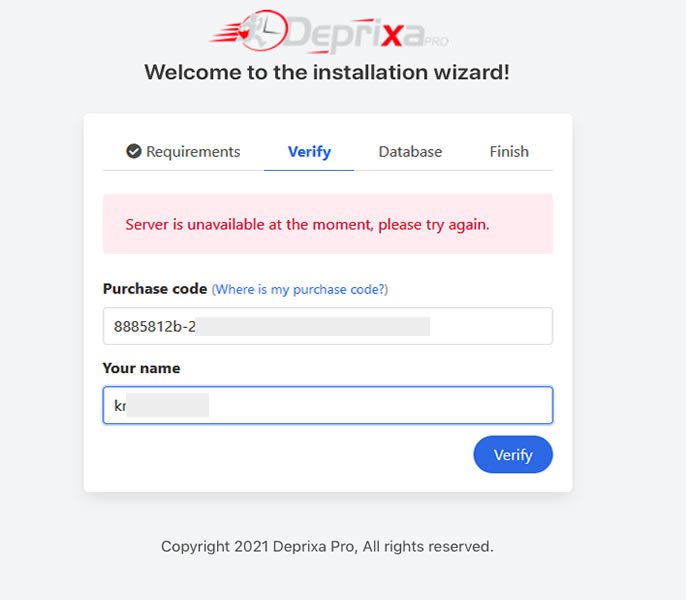
install/ directory immediately after installation is complete. Leaving it accessible is a critical security risk.Yes. Deprixa Pro runs on any shared hosting plan that supports PHP 8.2+ (recommended PHP 8.4) and MySQL 5.7+ / 8.x / MariaDB 10.3+. The most common and tested providers include Hostinger, SiteGround, Namecheap, and A2 Hosting. Ensure that cURL, PDO, JSON, XML, and OpenSSL extensions are enabled. You can verify this by checking your hosting control panel's PHP configuration or running a phpinfo() file on your server.
Deprixa Basic is a courier-only system: shipments, consolidation, invoicing, tracking, and payments. It does not require IonCube and the source code is 100% open.
Deprixa Pro adds: Pre-Alerts (online shopping registration), Warehouse Package management, Pick-Up scheduling, RBAC multi-role system (v8.5), Automatic tariff tables, Client special tariffs, ClickSend SMS, WhatsApp message templates with full CRUD, Driver module, Digital signatures, and SEO meta tag configuration.
Deprixa Pro ships with Spanish (ES), English (EN), Arabic (AR â RTL), French (FR), and Hebrew (HE). To add a new language:
lang/en.php file and rename it to your target language code (e.g., lang/pt.php for Portuguese).OpenSSL extension is enabled, as PHPMailer requires it for encrypted connections.Yes. Invoice and label designs are generated using TCPDF and are fully customizable. The template files are located in the modules/courier/ folder (look for files ending in _pdf.php). You can modify the layout, add your company logo, adjust colors, and change the field arrangement by editing the TCPDF drawing calls in these files. Basic PHP knowledge is required for customization.
The company logo, name, and address shown on the invoice are pulled from Settings â Company Information and do not require code changes.
Open a support ticket at ticket.deprixapro.site. When submitting a ticket, always include:
Response time: up to 2 business days. Support covers installation assistance, configuration guidance, and bug reports. Custom development (new features, design changes) is not included in the standard support scope.
In this new version of Deprixa Pro 8.5, the entire script has been modified to correct modules and add new functions, improving the structure in PHP and PDO. New database tables and fields have also been created.
For developers who have modified previous versions with their own modules, updating can be challenging because itâs not a simple copy-and-replace process. Due to extensive changes throughout the script, basic programming knowledge is essential for making any updates.
If you are using an older version, make a backup of all files and your database, then follow these steps:
Basic programming knowledge is required for this critical update. The new database contains new tables and fields, so follow these steps to ensure compatibility with your previous version:
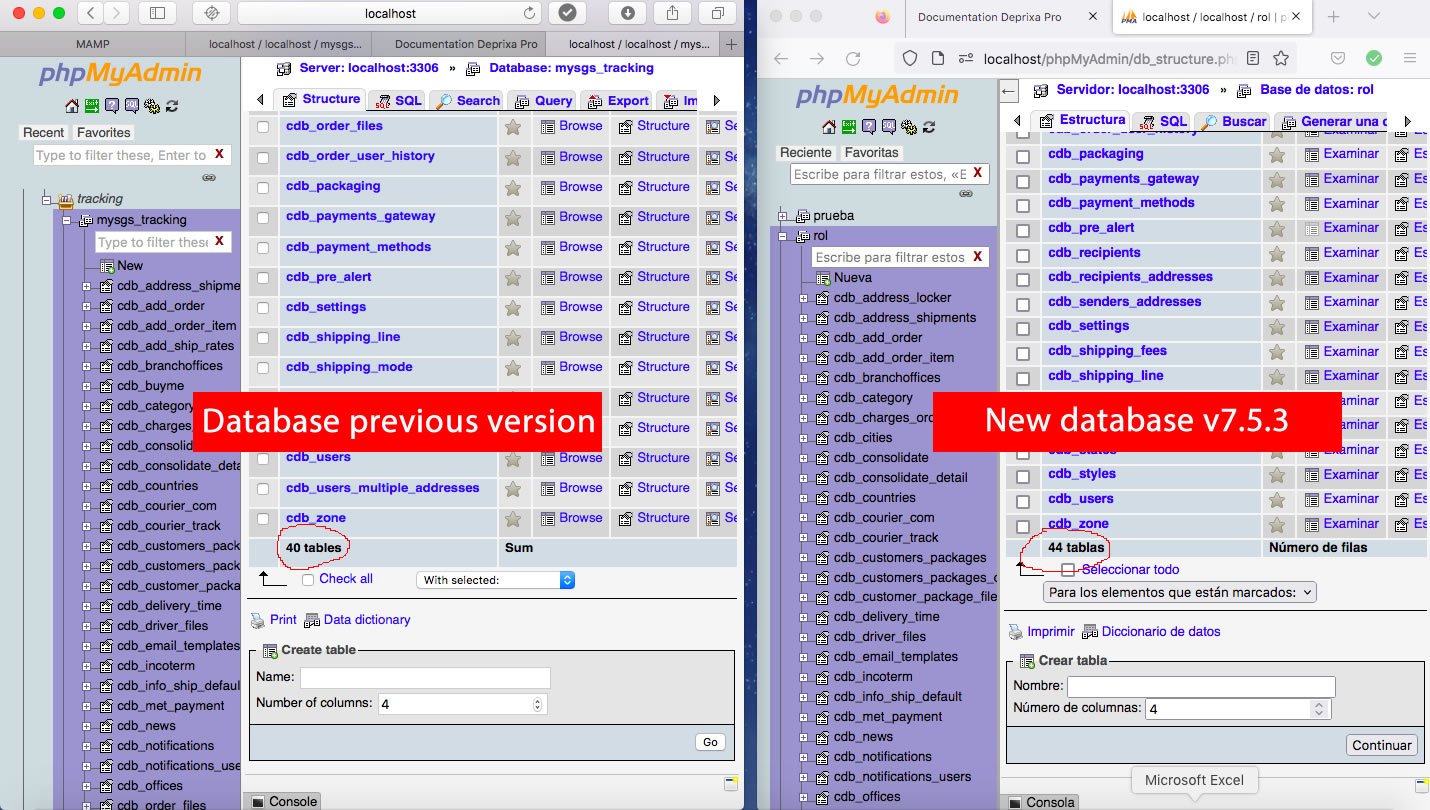
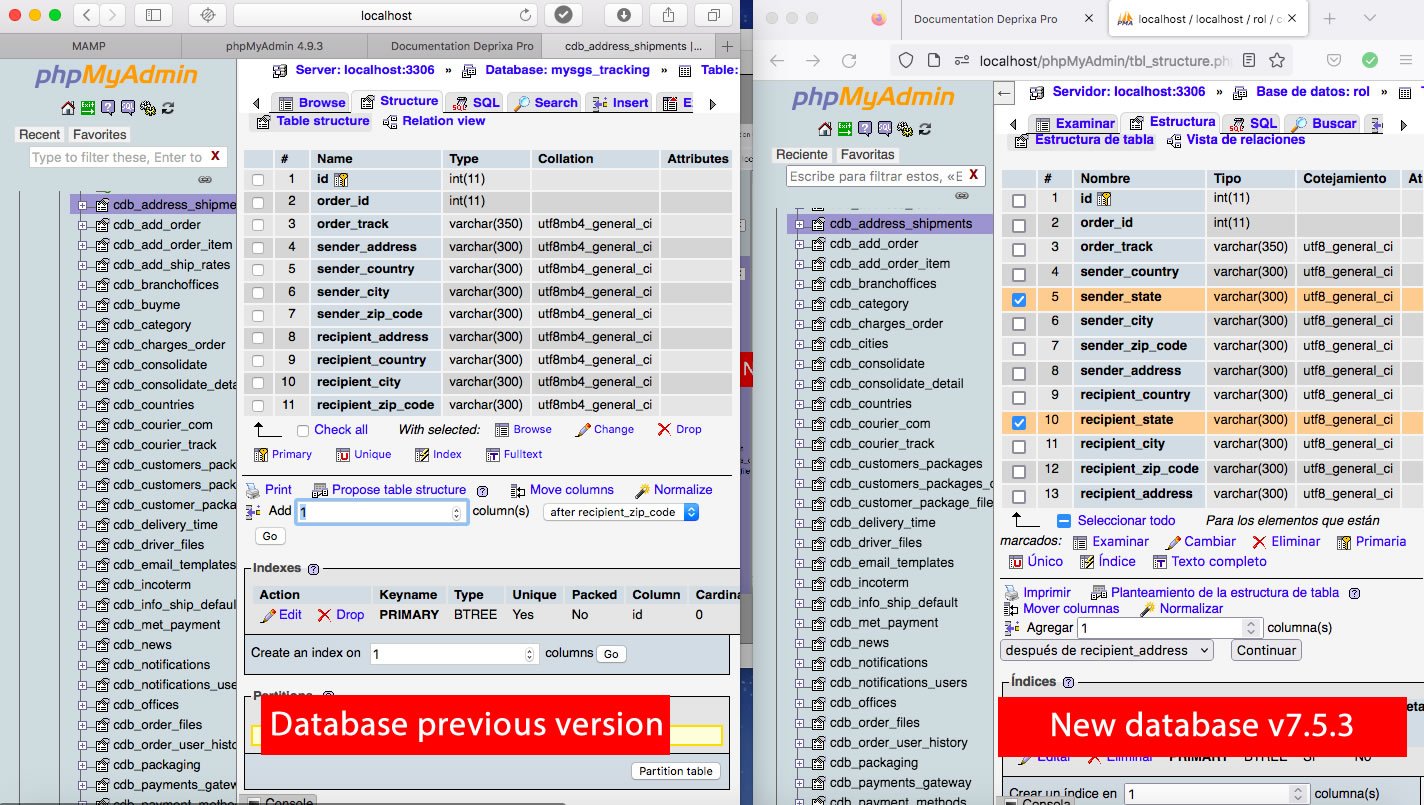
Note: Review both databases thoroughly to identify any new fields that need to be added to the previous version's database.